Appearance
Sale update
The Sale update page consists of the following sections (or “panels”):
- Property information
- Sale details
- Internal notes
- Vendor(s)
- Purchaser(s)
- Legal description
- Supps, analyses & past sales
- Attachments
- Attachment folders
These panels can be expanded, collapsed, and arranged on one or more tabs. You can save tab layouts, and instantly switch between multiple tab layouts.
The panel ordering is associated with your user account, so even if you log on from a different computer, the panel ordering will be as you have set it elsewhere.
If you make changes to any of the fields or values and try to load a different page in the current tab without saving, the browser will ask you if this is what you really want to do. The same applies if you try to close the tab or the browser window without saving.
There is a Save button at the top of the page. You can press it to save whenever you make changes to the property.
Command buttons
There is a Save button at the top of the page. You can press it to save whenever you make changes to the sale.
There is a Delete  button at the top of the page that will allow you to delete the sale if there is no analysis associated with the sale.
There is a View import log button in the command panel that you can click to view the import log for the file containing this sale. Clicking this button will open the import log in a new tab.
There is a PDF button that will generate a PDF sale detail report for the sale.
Property information
This information is about the property. You can change the area, and the zone / component. Note that you can’t change these independently. The zone is determined by the component.
The PID is a link that will take you to the Property update page, and there are links next to the address that allow you to view the property in Google Maps, ValMap or SIX.
Sale details
This panel contains information about the sale itself. The only field you can’t update here is the sale source, which is determined by the system to be one of LPI, OSR or USER.
Vendors
You are able to modify the list of vendors. You can reorder them, change the information about the vendor, add new vendors or remove existing ones.
There are control icons at the right side of the table allowing you to move the row up or down, edit the item, or delete (trash) the contents of the row.
When you add or edit a vendor, the page will show the following popup to enable you to make changes:
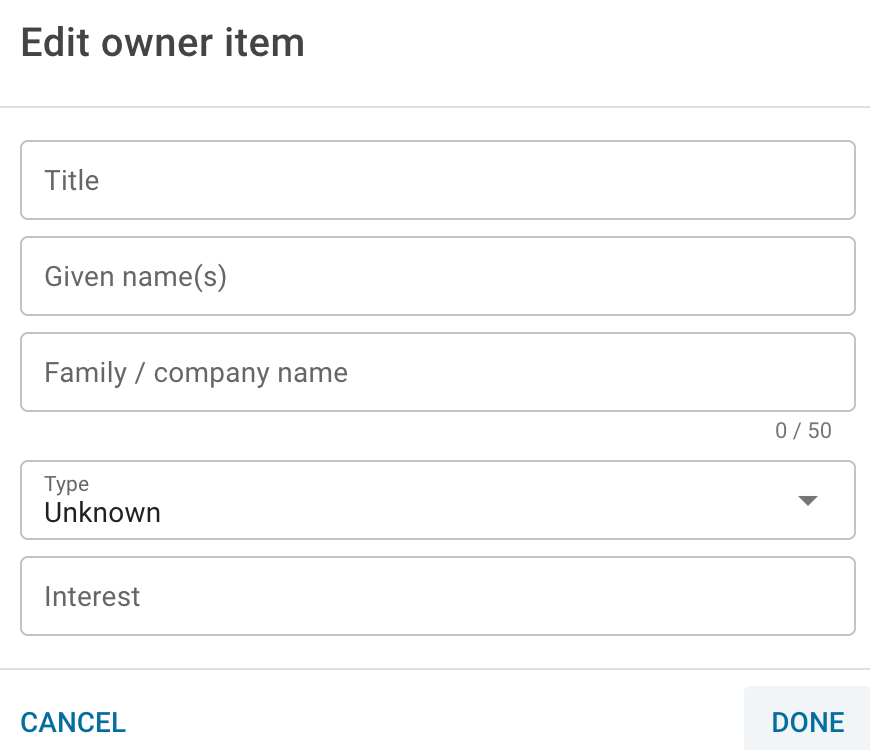
Click Cancel to prevent your changes being applied to the sale; click Done to keep your changes.
Your changes are not permanently saved to the database until you update the sale.
Purchasers
The Purchasers panel behaves the same as the Vendors panel.
Legal description
The legal description is a plain text box containing the legal description. You can’t format this text as it doesn’t use the Note editor.
Analyses
This panel contains a list of the analyses that have been undertaken on this property. You can click the Analysis ID to view the analysis directly, and you can also click the Add analysis button to create a new analysis based on this property.
If you click this button, the page will show a popup asking you specify the year to which you will be adjusting the analysis.
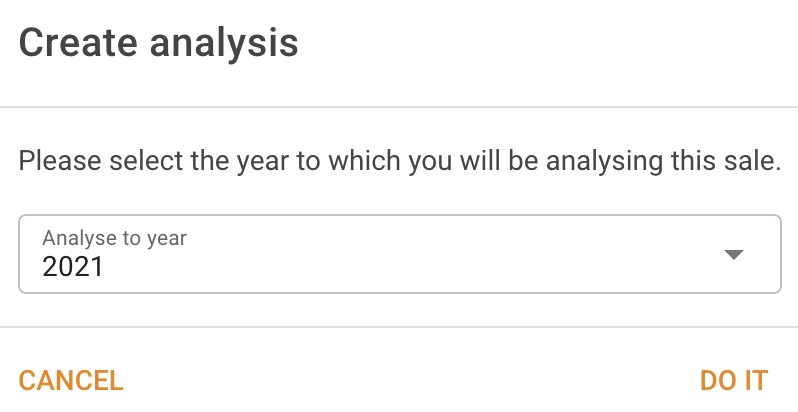
The popup will only show you years that don’t already have sales for this analysis.
Attachments
The Attachments panel contains a list of all the attachments associated with the property. They are displayed in order of attachment date and time to start with, but if you rearrange them the order will be retained.
You can add attachments to this list by simply dragging and dropping them on to the page, or by clicking the Upload attachments button. Then click Add files… in the popup.
You can delete any attachments from the property by clicking the Remove  button. The system will ask you if you’re sure you want to do this, because deleting the attachment will remove it from any analyses, supps and/or worksheets.
If you try to delete an attachment that is also used in other properties, you will be given the opportunity to delete the attachment from all other properties. This is not the default behaviour, and you have to actively choose for this to happen. Deleting an attachment from a property actually unlinks it if the attachment is in use by another property. It's only when it's deleted from the last property that the attachment file is actually deleted from the server.
ANYTHING YOU DO WITH ITEMS IN THIS PANEL WILL BE RECORDED ON THE SERVER IMMEDIATELY.
You don’t have to click the Update button in order to have these changes become permanent.
Attachment folders
The Attachment folders panel provides a tree view of attachments associated with the property. Attachments are split into folders based on the corresponding analyses, worksheets and properties. They are displayed in order of attachment date and time to start with, but if you rearrange them the order will be retained. Order is saved per-folder. Ensure that any changes to order are made in all required folders, not just one.
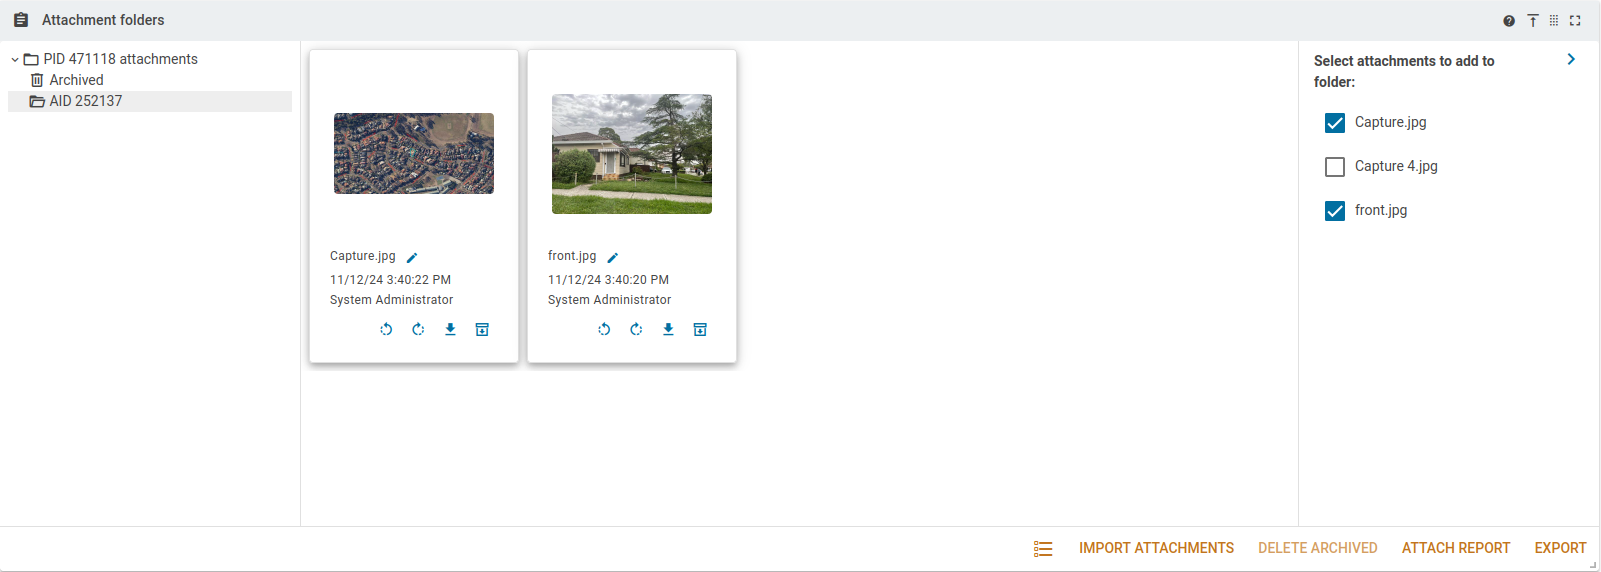
Folders are presented in a tree on the left side of the panel. The currently selected folder is highlighted in grey. Folders can be switched by clicking on the desired folder's name in the tree.
The panel can be switched between grid view and tile view.
Tile view
Tile view is very similar to the existing attachments panel, with all attachments within a folder laid out as preview tiles.
Grid view
Grid view presents the attachments as a table of values. Attachments can be rearranged by dragging the triple bar icon in grid view, or by dragging the tiles around in tile view.
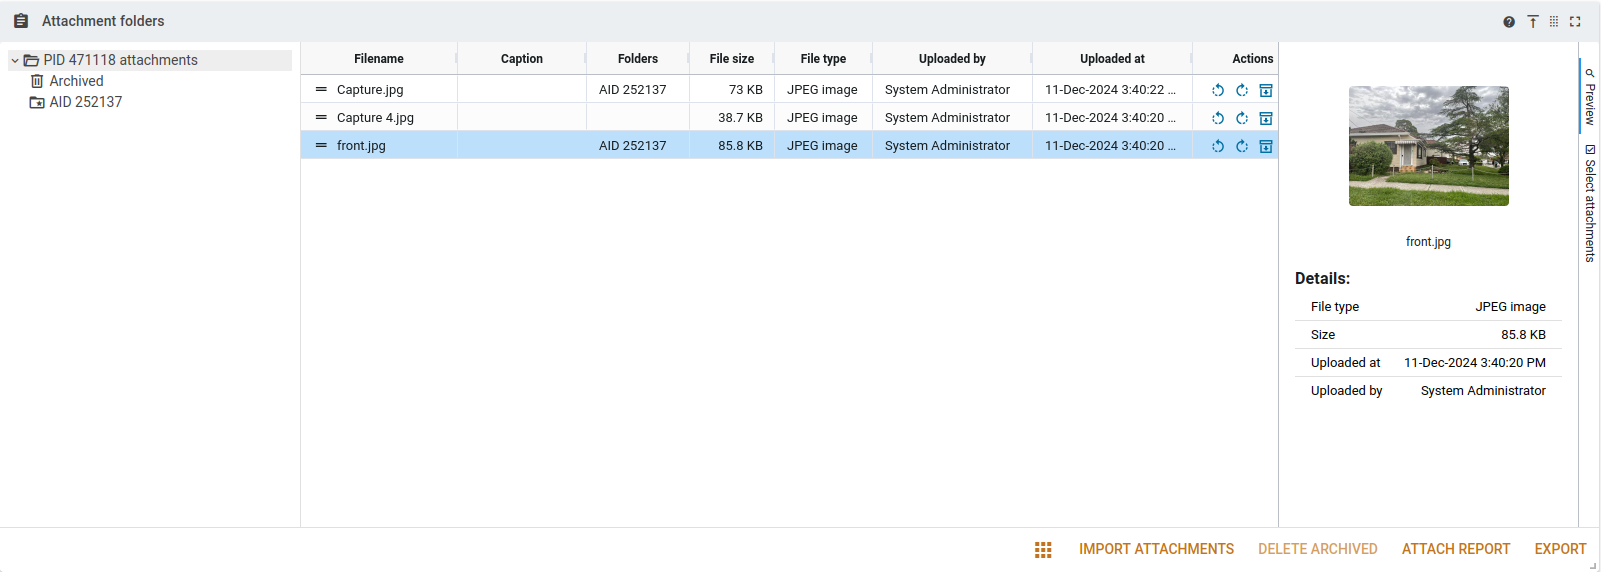
To copy attachments to different folders (e.g. from the property to an analysis), the rows in grid view can be dragged and dropped onto the folders in the tree on the left. Dropping rows onto these folders will copy attachments, unless dropped onto the Archived folder, which will remove them from all folders and move them to the archive. Multiple rows can be selected by shift-clicking them. Dragging any of the selected rows will copy all of the selected attachments in one move.

In the grid view, a preview tab is present on the right side. When a single row is selected, this tab will present information about the corresponding attachment, as well as a preview. The tile view does not have this preview tab.
When in either view, attachments can be quickly added to a folder using the Select attachments tab. This tab provides a checkbox list of all attachments on the property. Checking the corresponding box will copy the attachment into the currently selected folder. Unchecking will remove it. This list is not available in the Archived or property folders.
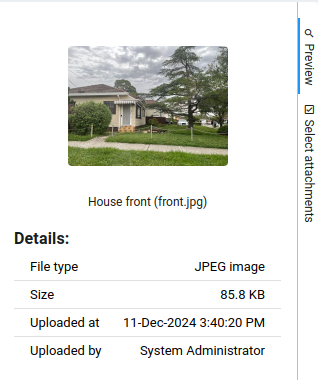
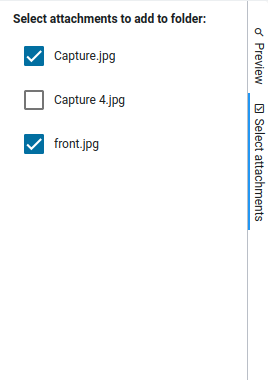
You can add attachments to a property by dragging and dropping them on to the page, or by clicking the Upload attachments button. Then click Add files… in the popup. Note that attachments are only added to the default folder (denoted by a starred folder on the left) and the property folder. Further arrangement should be handled using the folder view itself.
When in a folder, you can archive any attachments by clicking the Archive ![]() button. This will move them to the Archived folder. When in the archive folder, you can delete any attachments using the Remove
button. This will move them to the Archived folder. When in the archive folder, you can delete any attachments using the Remove  . Alternatively, archived attachments can be moved back to the property folder using the Unarchive
 ![]() button. If desired, all archived attachments can be deleted using the Delete archived button. The system will ask you if you’re sure you want to do this, because deleting the attachment will remove it from any analyses, supps and/or worksheets.
button. If desired, all archived attachments can be deleted using the Delete archived button. The system will ask you if you’re sure you want to do this, because deleting the attachment will remove it from any analyses, supps and/or worksheets.
ANYTHING YOU DO WITH ITEMS IN THIS PANEL WILL BE RECORDED ON THE SERVER IMMEDIATELY.
You don’t have to click the Update button in order to have these changes become permanent.
This panel is intended to be used instead of the Attachments panel. Simultaneous use of both panels may have unpredictable effects. Please only use one or the other at a time.
Internal notes
The internal notes are entered using the Note editor. You can format the text using most regular styles. This formatting will be applied to the text if it is included in pages within MVOW, and if it is printed in PDF reports.
There is a button under the notes that you can click to pull the internal notes from the PID into the sale's internal notes field. You'll have to save the sale to keep the changes.