Appearance
Updating items
An update page allows you to document a wide range of information regarding the Property, Supp, Analysis or Sale. The update page is comprised of panels that can be independently shown or hidden. The panels can be arranged into a variety of layouts. You can switch between multiple layouts to suit different tasks.
Opening an item
From any search results page, identify the item you wish to open.
To open the item
- Click on the PID link. The system will open the item.
To open the item in a separate browser tab
- Double-click anywhere else in the row. The system will open the item in a separate browser tab.
Viewing the item summary
To see a summary of the current item, click the update page
Info button. An info box displays the item summary.
This panel will stay visible until you click the Info button again to hide it.
Working with panels
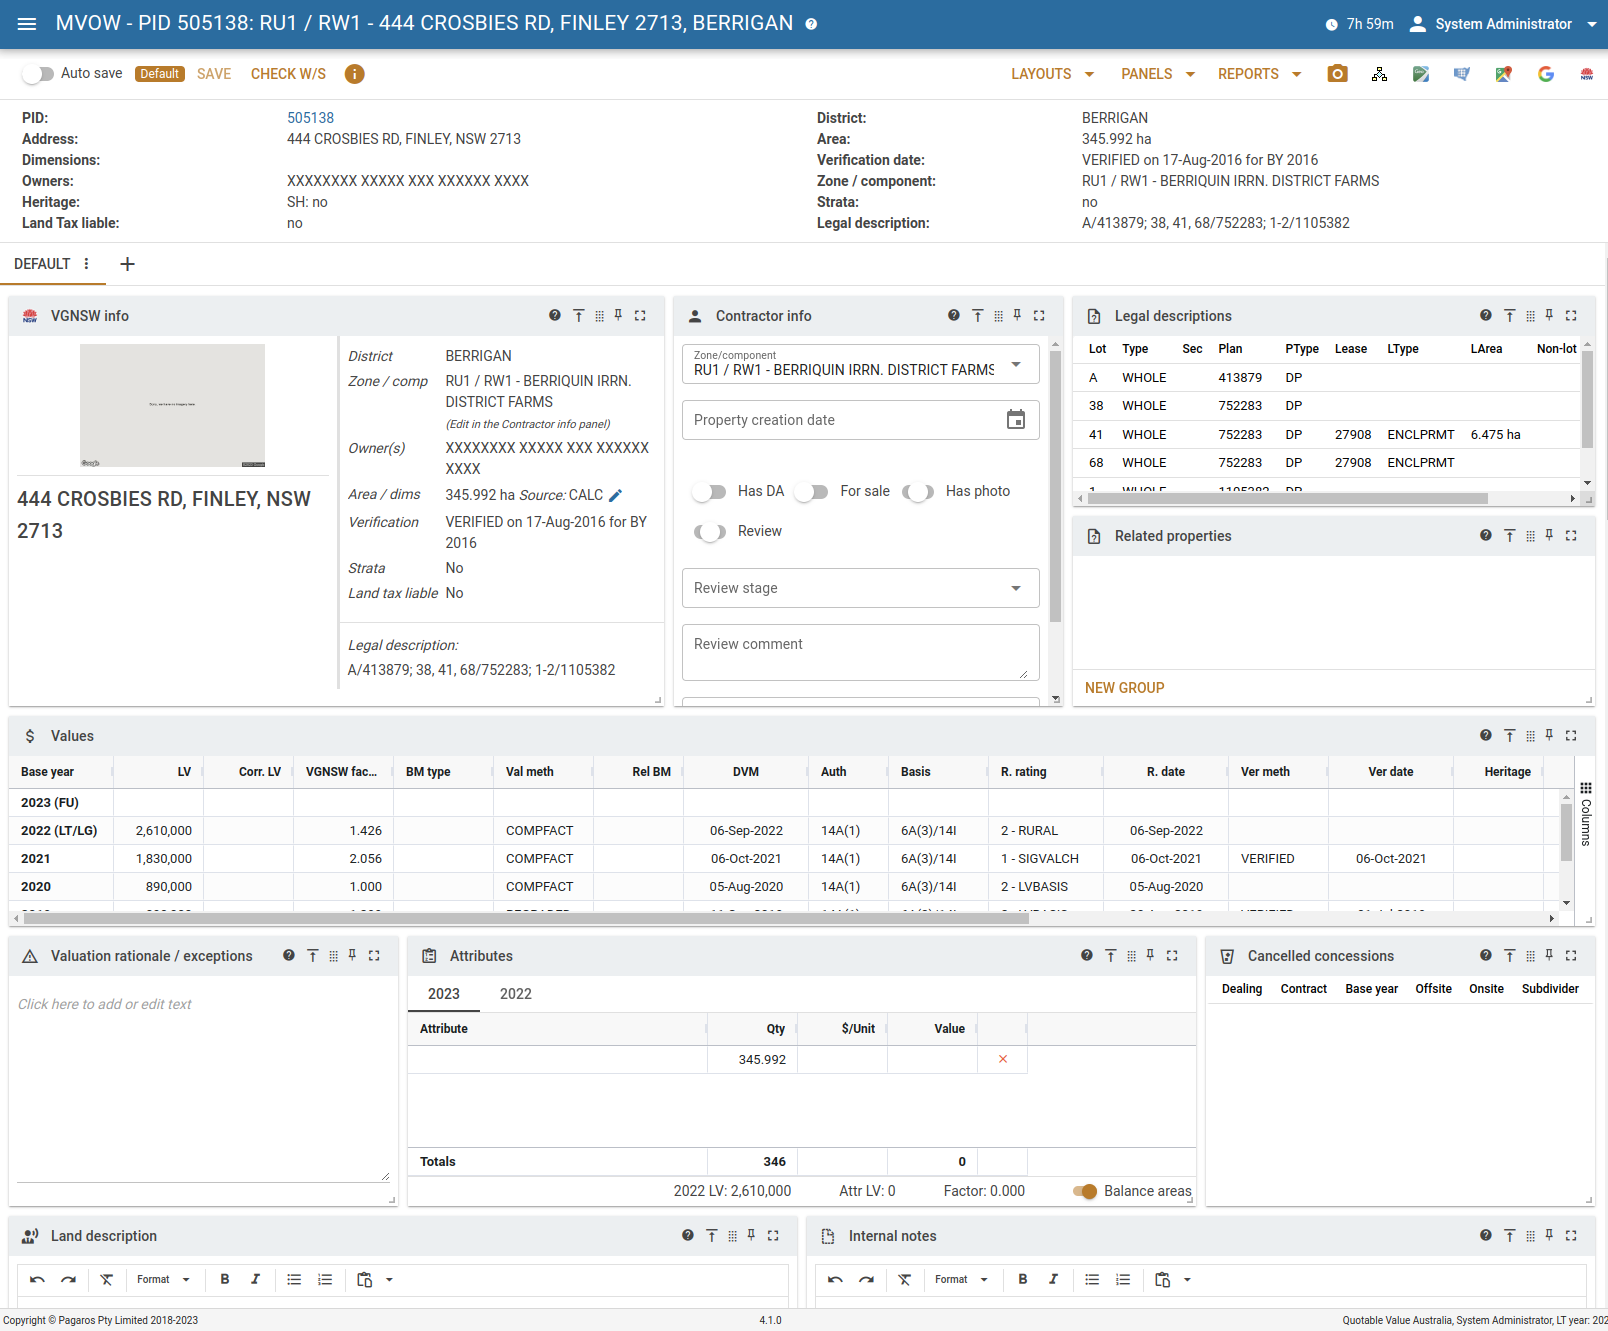
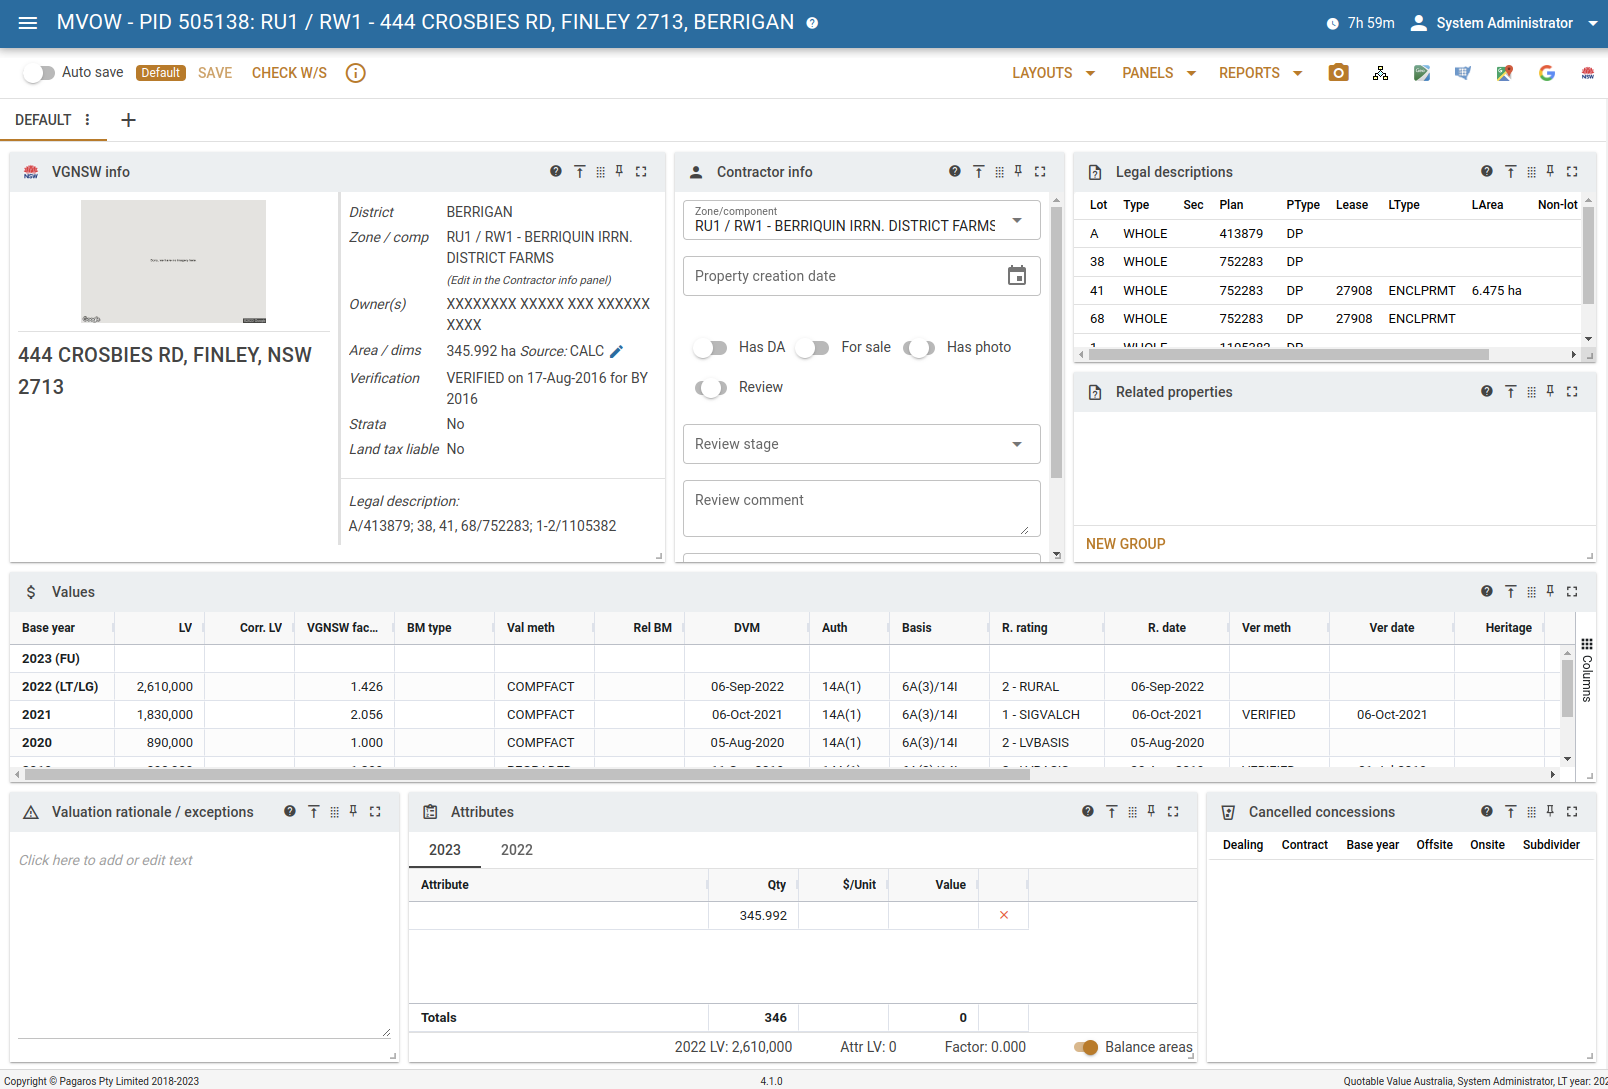
Each update page is comprised of a series of panels. Each panel is used to present a chunk of information.
This screenshot shows a Property update page. The following named panels are visible in the screenshot:
- VNSW info
- Contractor info
- Related properties
- Values
- Valuation rationale / exceptions
- Attributes
- Cancelled concessions
Resizing panels
You can change the size of any panel by dragging the Resize  handle located in the bottom-right corner of the panel.
Alternatively, you may want to make a specific panel enter a “full screen” mode. To enter full screen mode, click the
Fullscreen button to make the panel expand to fill the entire
browser window.
Dismiss full screen mode by clicking the Close  button.
Moving panels
You can drag any panel to a new position by click-dragging the Drag panel  button.
You can also move any panel to the top position by pressing the Top panel  button.
Showing and hiding panels
Update pages default to showing all panels. You can show or hide individual panels by using the Panels menu.
To hide a panel, open the Panels menu and untick it.
To show a hidden panel, open the Panels menu and tick it.
It is particularly handy to choose which panels will be shown and which hidden when designing new layouts.
Pinning panels
When scrolling down the page, panels at the top can scroll off the screen. To make it so that a panel is always visible, you can pin the panel. Pinning a panel will cause it to be displayed on the left-hand side of the page, no matter where you scroll.
To pin a panel, press the Pin panel  button. The
button depresses and the panel is pinned to theleft-hand side of the update page.
To unpin the panel, press the Pin panel  button. The
button releases and the panel is no longer pinned.Creating new tabs
You can choose to arrange panel layouts across multiple tabs. To add a tab, press the
New tab button, name the tab and press Save.
By default, all panels will appear on your new tab. Deselect any panels you don’t want for the new tab using the Panels menu.
Creating a new panel layout
You can create new panel layouts to suit different tasks.
To create a new layout
- Choose Layouts | Save tab layout as…
- Enter the name for the new layout, then press Save. The new layout is saved.
For any panel layout other than the default, any changes you make to the panel layout are automatically saved to the currently-selected layout. So if you want a new panel layout, you’re best off creating the new panel layout then arranging it.
If you’re transitioning from MVP3, you might want to arrange the panel layouts just like it was in MVP3. See Transitioning from MVP3 to MVOW.
Switching panel layouts
You can rapidly switch between panel layouts.
To switch to different layout
- Open the Layouts menu.
- In the Select tab layout section of the menu, select the layout name you want to switch to. The update page now displays the selected layout.
Managing panel layouts
Beyond creating panel layouts and displaying them, you can also
- Create a new panel layout
- Reorder panel layouts
- Rename panel layouts
- Remove panel layouts
You can achieve all these actions within the Manage tab layouts dialog.
To access the Manage tab layouts dialog, select Layouts | Manage tab layouts.
Resetting to current layout
If at any time you want to make reset the current layout to the factory defaults, simply select Layouts | Reset tabs.
When you select this menu item, your current panel profile will immediately be reset back to the factory default. You will lose whatever is your currently-selected layout, so be careful which layout is selected when you choose this option.
Editing panel content
For information on editing specific panels within each update page, see:
Viewing previous years’ worksheets
You can view the PDF summary of previous years’ worksheets.
To view a previous years’ worksheet, open the Reports menu and choose the worksheet PDF from the chosen year.
Attaching photos
To attach photos to the item
- Press the Photo
 button. The Mobile photos page appears.
 - Click any of the PID buttons. The Attach files dialog appears.
- Click the Upload attachments button to attach photos.
- If you’re using an iPhone, tap the Take Photo button, take the photo, then press Use Photo. The photo will fill the attachments pane. Press Done.
- If you’re using Mac or Windows, locate the photo file from Explorer (Windows) or Finder (Mac) and press Open. The photo will fill the attachments pane. Press Done.
- Press the browser’s Back button to return to the update page. You can find the photo in the Attachments panel.
Transferring to VNSW ValMap
To transfer the property to ValMap, press the ValMap  button. Assuming your browser is configured to automatically open the ValMap transfer (.mvpvm) files, ValMap will select the property and zoom to an appropriate level. You may have to log into ValMap as part of this process.
Transferring to the VNSW ValMap portal
To transfer the property to the ValMap portal, press the ValMap portal  button. The ValMap portal will select the nominated property and zoom to an appropriate level. You may have to log into the ValMap portal as part of this process.
Transferring to MVOW mapping
To transfer the property to an MVOW map, press the MVOW mapping  button. MVOW mapping will select the nominated property and zoom to an appropriate level.
Viewing in Google Maps
To view the property in Google Maps, press the Google Maps  button.
Viewing in SIX Maps
To view the property in SIX Maps, press the SIX Maps  button.
Saving changes
To save changes after editing the update page, press the Save button.
To save changes automatically while editing the update page, switch on the Auto Save toggle.